
What does a professional solar installation in Kitale, Kenya actually look like?
It starts long before the inverter is switched on.
A properly installed solar power system requires more than putting solar panels on a roof and connecting a battery. The system has to be correctly designed, mechanically secure, electrically protected, properly labelled, commissioned and tested.
In this case study, we document a 15 kWp solar installation in Kitale, Trans-Nzoia County, from equipment preparation and roof mounting to battery installation, inverter wiring, protection, commissioning and final testing.
And so, the installation combines an existing solar array with new high-efficiency Jinko solar panels, two large LVTopsun lithium batteries and a Deye hybrid inverter.
Our objective was not simply to get the system producing electricity. It was to deliver a system that could be inspected, tested, maintained and understood after installation.
If you are considering a solar installation for your home, business, farm, institution or commercial property in Kenya, this case study gives you an inside look at the level of detail that should go into a professional installation.
Planning a solar system in Kitale, Eldoret or elsewhere in Kenya? Contact Aretha Solar Power Solutions for a site assessment, system design and quotation.
The 15 kWp Solar System at a Glance
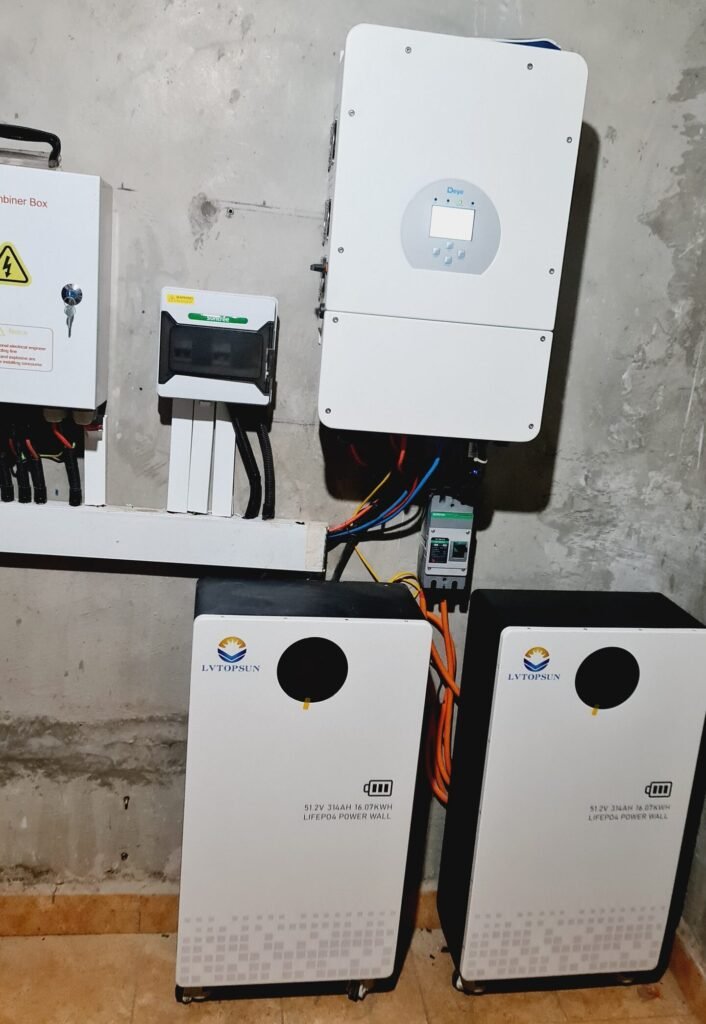
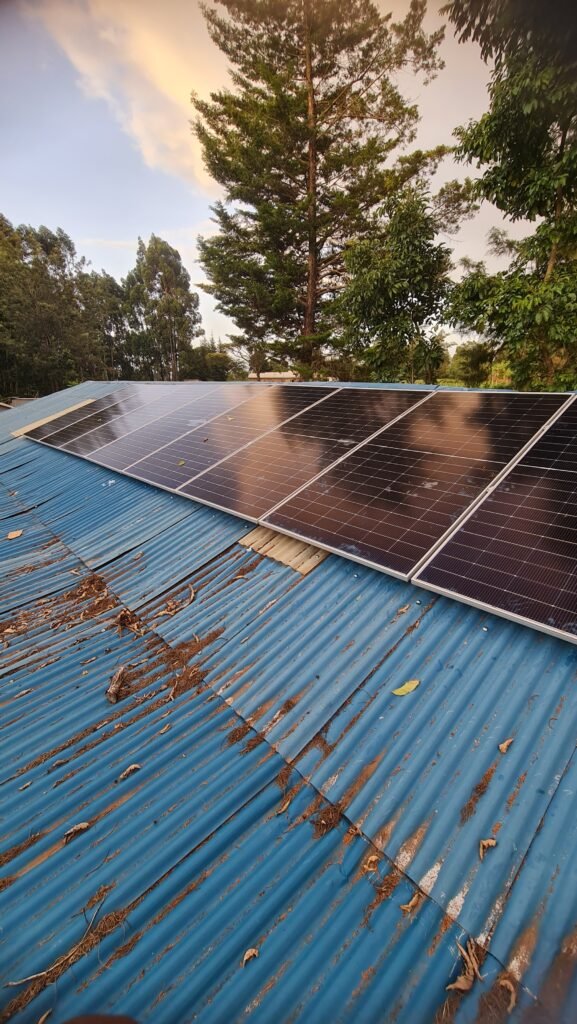
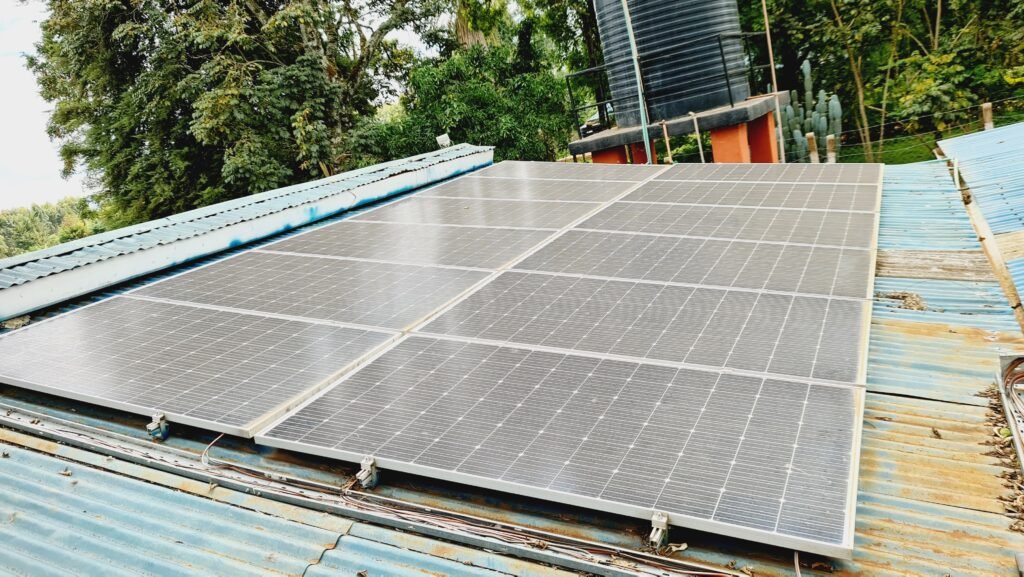
As can be seen, the completed system combines an existing solar array with eight new 620 W Jinko modules.
The total installed photovoltaic capacity is approximately 14.96 kWp, commonly rounded to a 15 kWp solar system.
System Specifications of This Solar Installation in Kenya
| Component | Specification |
|---|---|
| Hybrid inverter | Deye SUN-12K-SG01LP1-EU, 12 kW |
| Inverter battery voltage | 48 V / low-voltage battery system |
| MPPTs | 3 MPPT trackers |
| Existing solar panels | 24 × 420 W |
| Existing PV capacity | 10.08 kWp |
| New solar panels | 8 × Jinko JKM620N-66HL4M-BDV |
| New PV capacity | 4.96 kWp |
| Total PV capacity | 14.96 kWp |
| Lithium batteries | 2 × LVTopsun LVTS-512314-G3 |
| Battery capacity | 16.08 kWh each |
| Total nominal battery capacity | 32.16 kWh |
| Battery communication | CAN bus BMS |
| PV protection | DC Type 2 SPD and string protection |
| AC protection | AC Type 2 SPD and associated protection |
| Battery protection | DC fuses and battery isolators |
| Surge/lightning protection | Lightning arrestor and earthing system |
Take note that the Deye SUN-12K-SG01LP1-EU is a low-voltage hybrid inverter designed for battery storage applications. Deye’s published specifications list three MPPT trackers, a 40–60 V battery range, a 125 V PV start-up voltage and a 150–425 V MPPT operating range, with a 500 V maximum PV input voltage.
This is an important distinction when comparing solar quotations.
A system can have a larger solar-panel capacity than the inverter’s AC rating. In this installation, the PV array is approximately 15 kWp while the inverter is rated at 12 kW AC.
The correct system design therefore has to consider the inverter’s PV input limits, MPPT voltage range, current limits, battery charging capability and expected load profile—not simply add up the wattage printed on the panels.
Before Installation: Every Component Was Checked
A professional installation begins before anyone climbs onto the roof.
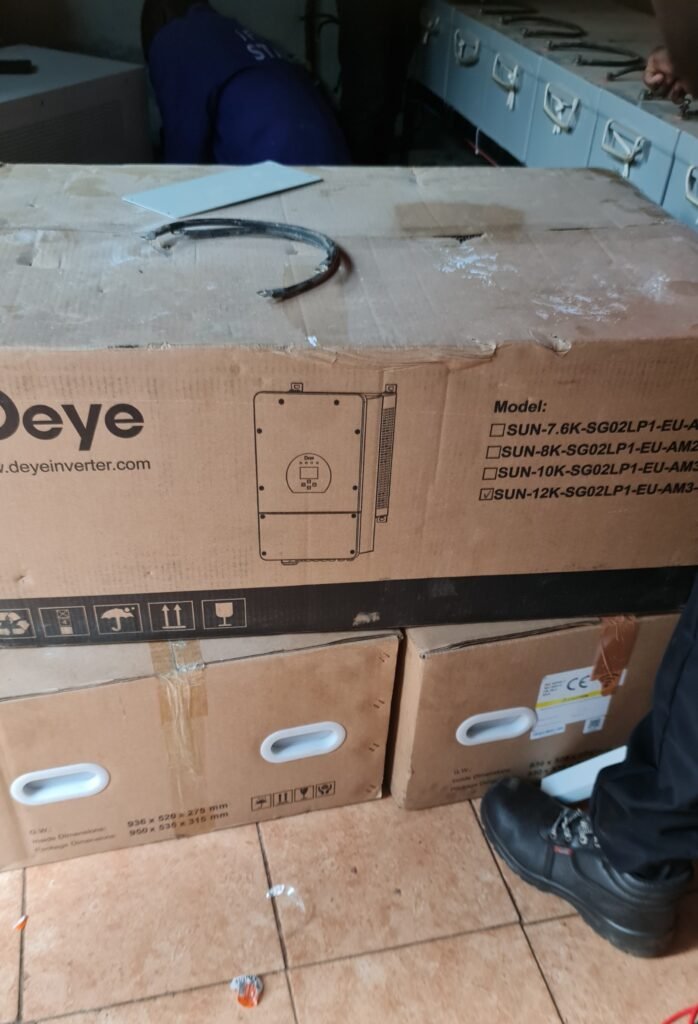
Before installation, the equipment was laid out and checked against the system design.
This included the inverter, batteries, solar panels, mounting hardware, PV cables, protection devices, battery cables, isolators, fuses, communication cables and other balance-of-system components.
This step may look simple, but it helps identify missing components or incorrect equipment before installation begins.
It also gives the installation team an opportunity to inspect equipment for visible damage before it is installed.
For larger solar installations, preparation is particularly important because once equipment is on the roof or permanently wired, correcting an overlooked component becomes more difficult.
Professional solar installation is about preparation as much as installation.
📸 PHOTO — Equipment Before Kenya Solar Installation
Step 1: Preparing the Roof for Solar Panel Installation
The roof is one of the most important parts of a solar installation.
Solar panels may operate for decades, so the mounting system needs to remain mechanically secure while protecting the building underneath.
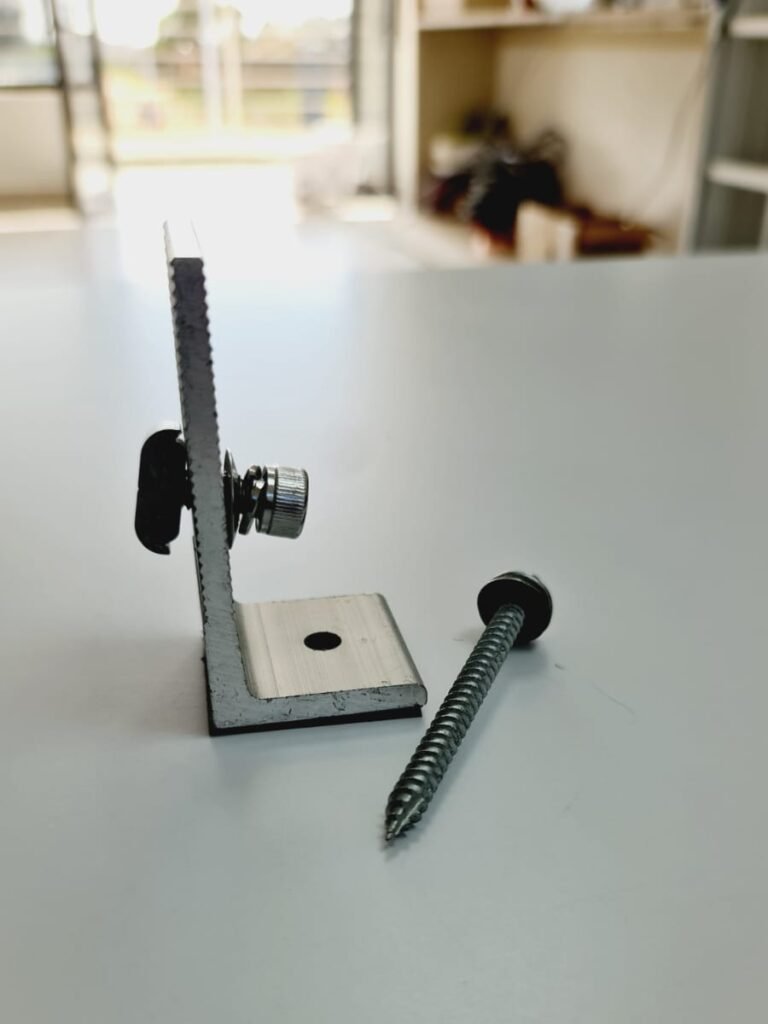
For this installation, aluminium mounting rails were positioned to provide appropriate support for the panel rows.
The rails were positioned approximately 300 mm from the top and bottom edges of each panel row, while the L-foot mounting points were spaced at a maximum of approximately 600 mm, subject to the roof structure and mounting requirements.
The objective was to create a secure mounting structure without compromising the roof.
Preventing Roof Leaks Around Solar Mounting Points
One of the most important details in a roof-mounted solar installation is sealing every roof penetration correctly.
Realize that solar mounting hooks and L-feet may require fasteners to pass through the roofing material. If those penetrations are poorly installed or inadequately sealed, they can become potential points for water ingress.
For this installation, EPDM rubber sealing washers were used at the roof penetrations.
EPDM is commonly used for weather-resistant sealing applications because it is designed to withstand outdoor environmental exposure.
The principle is straightforward:
A solar installation should protect the roof, not create a new maintenance problem.
The mounting points were also installed with attention to structural security and alignment so that the finished panel array would remain properly supported.
This is one reason why a solar installation should not be judged purely by the number of panels installed or the price on the quotation.
The mounting system, roof penetration treatment, cable routing, earthing and protection all contribute to the quality of the finished installation.
📸 PHOTO — L-Foot and EPDM Washer
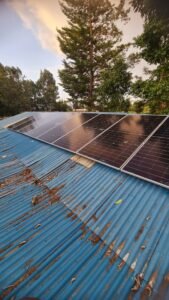
Step 2: Installing the Eight Jinko 620 W Solar Panels
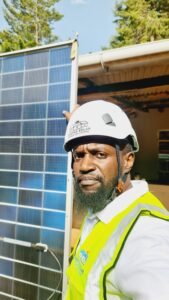
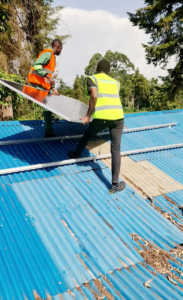
As can be seen from the photo below, the new part of the PV array consisted of eight Jinko 620 W N-type bifacial solar panels.
The panels were arranged in a one-row eight-panel series configuration.
Each panel weighs approximately 30.6 kg, making safe handling important during installation.
Large-format solar panels should not be handled casually. Carrying and lifting them incorrectly can result in injury or accidental damage to the module.
For this reason, the panels were lifted and positioned using two-person handling.
Once positioned, the modules were secured using appropriate mid-clamps and end-clamps.
Solar Panel Bonding and Earthing
Mechanical mounting is only one part of the installation.
The metal panel frames and mounting structure also need to be appropriately bonded and integrated into the site’s protective earthing arrangement according to the design and applicable requirements.
For this installation, toothed bonding mid-clamps were used at selected mid-clamp positions to provide metal-to-metal bonding between the module frame and mounting system.
The objective is to create a reliable electrical bonding path rather than relying on an accidental or inconsistent connection.
This is particularly important when designing protection against electrical faults and atmospheric surge events.
PV Cable Selection and String Protection
The new Jinko string was wired using approximately 40 metres of 6 mm² H1Z2Z2-K solar PV cable.
The cable was selected for outdoor photovoltaic service, including exposure to sunlight and the environmental conditions associated with rooftop installations.
String protection was also incorporated.
The string used a 20 A DC fuse, with the final fuse selection based on the electrical characteristics of the module/string and the applicable equipment and design requirements.
Protection devices should never be selected simply because they are readily available.
The voltage, current, short-circuit current, cable capacity, module maximum series fuse rating, installation method and inverter requirements all need to be considered.
📸 PHOTO — Jinko Panels Being Installed
Step 3: Installing the LVTopsun Lithium Batteries
The energy storage system consists of two LVTopsun LVTS-512314-G3 lithium batteries.
Each battery is rated at:
- 51.2 V nominal voltage
- 314 Ah capacity
- Approximately 16.08 kWh nominal energy
- Integrated battery management system
- CAN bus communication
Together, the two batteries provide approximately 32.16 kWh of nominal battery storage capacity.
That is a substantial amount of energy storage for a residential or commercial solar installation.
However, nominal battery capacity should not automatically be interpreted as usable energy under every operating condition.
Actual usable energy depends on factors such as the battery’s operating limits, state-of-charge settings, inverter configuration, temperature, battery management system limits and the desired battery reserve.
Why Battery Wiring Matters in Solar Installations
The batteries were connected in parallel using a star-point configuration.
Rather than taking the positive and negative connections from one battery and then feeding the second battery through the first, equal-length battery cables were used from each battery to a common central busbar.
This arrangement helps provide a more balanced electrical path between the batteries.
The battery cables used were 70 mm², with equal-length connections designed to help distribute current appropriately between the parallel battery units.
This detail is easy to overlook.
Two batteries can have exactly the same specifications on paper but behave differently if the interconnection arrangement creates significantly different cable resistance between them.
Good battery installation therefore considers:
Cable size + cable length + connection arrangement + protection + BMS communication.
Battery Fuses and Isolators
Each battery was separately protected.
A 200 A DC fuse was installed for fault protection, while a 250 A DC isolator provides a means of manually disconnecting the battery during maintenance.
These devices serve different purposes.
The fuse is intended to provide automatic protection against excessive fault current.
The isolator provides a deliberate means of disconnecting the battery circuit.
Finally, separating the battery protection and isolation functions makes the system easier to service and provides technicians with a controlled method of working on the equipment.
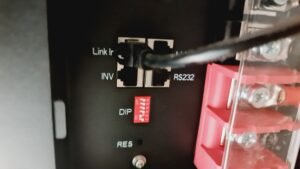
CAN Bus Communication Between the Batteries and Inverter
In our solar installation in Kitale, Kenya, the batteries were connected to the Deye inverter using CAN bus communication.
This allows the battery management system to communicate important information to the inverter.
Depending on the battery and inverter configuration, BMS communication can provide information such as:
- Firstly, battery state of charge
- Secondly, charging limits
- Thirdly, discharging limits
- Fourthly, battery voltage
- Fifthly, battery temperature
- Fault information
- Finally, protection status
A lithium battery installation should therefore not be treated like a simple pair of conventional batteries.
The communication between the BMS and inverter is an important part of a properly configured lithium energy-storage system.
📸 PHOTO — LVTopsun Batteries
Step 4: Installing the Deye Hybrid Inverter
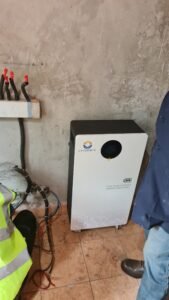
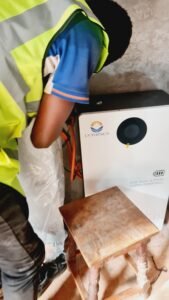
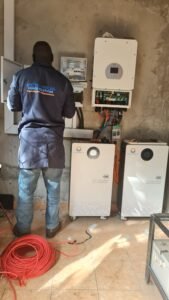
As we had shown in our earlier photo at the begining, the Deye inverter was mounted at a suitable working height on solid masonry.
The inverter is the central control point of the system.
It manages the relationship between:
- Solar generation
- Battery storage
- Grid supply
- Household or commercial loads
- Finally, backup power operation
The Deye SUN-12K-SG01LP1-EU is a 12 kW single-phase hybrid inverter with three MPPT trackers and low-voltage battery support. Its published specifications also include integrated protection functions and Type II surge protection on the AC and DC sides.
For a system of this size, proper cable identification is particularly important.
Every cable was labelled at both ends.
This makes future troubleshooting significantly easier.
Imagine a technician returning three years later to diagnose a problem.
In any solar installation, clear labelling can reduce the time required to identify where a cable originates and where it terminates.
Step 5: Cable Termination and Torque
It is important to realize that electrical connections are only as good as their terminations.
A connection that looks tight may not actually be correctly torqued.
For this reason, cable terminals were tightened according to the manufacturer’s specified requirements using a calibrated torque screwdriver where applicable.
Correct torque matters because both under-tightening and over-tightening can create problems.
An under-tightened connection can develop excessive resistance and heat.
Over-tightening can damage terminals, fasteners or equipment.
The installation therefore focused on:
Correct cable → correct terminal → correct torque → correct protection.
This is the type of detail that is difficult to see once a solar installation is completed, but it can have a major effect on reliability.
Step 6: DC and AC Surge Protection
Solar installations are exposed to electrical surge risks, particularly because solar arrays are installed outdoors and often occupy large areas of a roof.
For this installation, the protection system included:
- DC Type 2 surge protection
- AC Type 2 surge protection
- Battery isolation and protection
- Lightning protection
- Earthing system
The DC surge protection was installed on the photovoltaic side, while AC surge protection was provided on the inverter/load side.
A lightning arrestor was also incorporated into the installation and connected to the site’s earthing arrangement.
The exact protection arrangement should always be designed according to the site, equipment specifications, wiring configuration and applicable standards.
Step 7: AVS Protection
An AVS-30 automatic voltage switcher was incorporated into the system.
Voltage fluctuations can damage sensitive electrical equipment.
An automatic voltage protection device can disconnect the load when the incoming voltage moves outside configured limits and reconnect it when conditions return to an acceptable range, depending on the device and installation configuration.
For homes and businesses operating computers, televisions, refrigeration equipment, networking equipment, CCTV systems and other electronics, voltage protection can form an important part of the overall power-quality strategy.
Step 8: Earthing and Lightning Protection
Earthing is one of the most important—and most frequently misunderstood—parts of a solar installation.
It is not enough to simply drive a rod into the ground and connect a wire to it.
The complete protective earthing system needs to be designed and tested appropriately.
For this installation, the system included a lightning arrestor connected to an earth electrode arrangement.
The final earth resistance measurement recorded during commissioning was 4.7 Ω.
The significance of an earth measurement depends on the overall system design, applicable requirements and the type of installation.
The important point is that the earthing system was not simply assumed to be adequate.
It was measured.
That distinction matters.
Step 9: Solar String Testing our Solar Installation in Kenya
Before the system was commissioned, the photovoltaic strings were tested.
String voltage measurements were checked against the expected values and the inverter’s allowable PV input range.
This is particularly important when combining existing panels with newly installed panels.
The designer needs to understand:
- Panel Voc
- Panel Vmp
- String length
- Maximum system voltage
- Cold-weather Voc
- MPPT operating range
- Maximum MPPT current
- Maximum inverter PV voltage
- Existing array configuration
For example, the eight-panel Jinko string has a calculated cold-condition open-circuit voltage of approximately 461 V based on the design information for this installation.
The inverter’s published maximum PV input voltage is 500 V, while its stated MPPT operating range is 150–425 V.
That makes accurate design verification particularly important.
A professional installer should not simply say that a string is “within voltage” because its calculated voltage is below the absolute maximum.
The actual operating range and cold-weather voltage must both be considered.
This is exactly why string calculations and commissioning measurements matter.
Step 10: Battery and BMS Testing
The two lithium batteries were tested after installation.
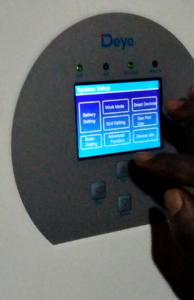
The battery management system communication with the Deye inverter was confirmed as active.
The battery units were also checked for voltage balance.
The recorded parallel battery balance was within approximately 0.1 V at the time of testing.
The purpose of this test is to confirm that the batteries are operating together appropriately rather than one battery carrying a disproportionate share of the load.
Battery testing also included checking the communication cables and confirming that the inverter was receiving battery information from the BMS.
Step 11: Full Load Test
A solar system should not be considered fully commissioned merely because the inverter turns on.
It needs to be tested under meaningful operating conditions.
For this installation, a load test was carried out at approximately 8 kW.
The system remained stable during the test.
This is significant because real-world loads can expose problems that may not appear when the system is operating with only a small load.
A properly conducted commissioning process should examine the system under realistic conditions without exceeding the equipment’s design limits.
Step 12: Final Commissioning our Kitale Solar Installation
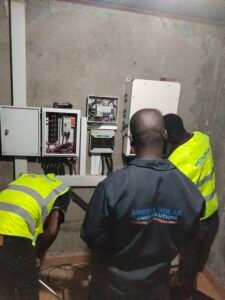
The final stage was commissioning.
The purpose of commissioning is to confirm that the installed system matches the design and operates safely.
For this installation, commissioning included checks covering the PV strings, battery system, inverter, protection devices, earthing, communication and output.
Commissioning Results
- Earth resistance: 4.7 Ω ✓
- PV string voltage checks: Within the verified design limits ✓
- AVS trip test: 38 ms ✓
- DC SPD status: Green ✓
- AC SPD status: Green ✓
- Battery BMS/CAN communication: Active ✓
- Battery parallel voltage balance: Within approximately 0.1 V ✓
- Inverter AC output: Approximately 220 V ✓
- Full load test: Approximately 8 kW and stable ✓
- Battery state of charge: 100% recorded by 10:47 a.m. ✓
The system was then documented.
A commissioning certificate, single-line diagram and test record were issued.
That paperwork is important.
A professionally installed solar system should not end with the installer packing away their tools.
The customer should have documentation showing what was installed, how the system was configured and what was tested.
📸 PHOTO — Commissioning
Why Solar Installation Quality Matters
When comparing solar installers in Kenya, it can be tempting to compare only the price.
For example:
Installer A: KSh X
Installer B: KSh Y
But the price alone does not tell you what is actually being installed.
Ask questions such as:
What solar panels are being supplied?
Ask for the exact manufacturer and model.
What inverter is being supplied?
The inverter should be appropriately matched to the load, PV array and battery system.
How are the batteries protected?
Ask about fuses, isolators, cable sizing and BMS communication.
How is the roof protected?
Ask how roof penetrations are sealed and how the mounting structure is secured.
What surge protection is included?
A professional design should address both the DC and AC sides where appropriate.
Will the system be tested?
Ask whether the installer will test earth resistance, PV strings, battery communication, inverter operation and protection devices.
Will you receive documentation?
Ask for the single-line diagram, commissioning record, equipment information and warranty documentation.
Note that these questions can help you distinguish between a cheap installation and a properly engineered solar system.
Solar Installation in Kitale, Kenya: Why Local Experience Matters
Kitale and the wider Trans-Nzoia region have growing demand for reliable energy solutions across homes, businesses, farms and institutions.
It is important to note that a solar installation in Kitale, Kenya needs to take into account the actual property, roof structure, electrical installation, energy consumption and customer requirements.
There is no single solar system that is appropriate for every customer.
A home requiring lighting, refrigeration, entertainment and internet backup has different requirements from:
- A commercial building
- A farm
- A school
- A hospital
- A workshop
- A retail business
- A hospitality facility
- An office
- A rural property requiring backup power
That is why we recommend load profiling and proper system sizing before installation.
The goal is not to sell the customer the biggest inverter or the largest number of batteries.
The goal is to design a system that matches the customer’s actual energy requirements and future plans.
What Makes a Professional Solar Installation Different?
At Aretha Solar Power Solutions, we believe a quality installation should be measurable.
That means:
Firstly, the panels should be properly mounted.
Secondly, the roof penetrations should be appropriately sealed.
Next, the cables should be correctly sized and protected.
Next, the batteries should be properly interconnected.
The inverter should be configured correctly.
The protection devices should be installed appropriately.
The earthing system should be tested.
Importantly, the battery BMS should communicate correctly with the inverter.
The system should be tested under load.
Finally, the customer should receive documentation.
Kenya’s solar PV regulatory framework requires solar PV design, installation, repair and maintenance to comply with relevant Kenyan standards, and EPRA’s licensing framework covers solar PV contractors, vendors and technicians.
For customers, this is another reason to ask prospective installers about their qualifications, licensing, documentation and installation practices before work begins.
The Final Result: A Solar System Built to Be Tested and Maintained
At the end of this installation, the objective was not simply to have solar panels producing electricity.
The objective was to deliver a complete energy system.
The approximately 15 kWp PV array, 12 kW Deye hybrid inverter and 32.16 kWh nominal lithium battery bank were integrated with appropriate protection, monitoring, cabling, mounting and commissioning procedures.
The final system was tested, documented and handed over.
That is what we believe a professional solar installation should look like.
And this is why we encourage customers to look beyond the price on a solar quotation.
The quality of the installation matters just as much as the equipment being installed.
Planning a Solar Installation in Kenya?
If you are planning a solar installation in Kitale, Eldoret, Nairobi or elsewhere in Kenya, Aretha Solar Power Solutions can help you determine what system you actually need.
We provide:
- Solar system design and sizing
- Residential solar installations
- Commercial solar installations
- Hybrid solar systems
- Battery backup systems
- Lithium battery installations
- Solar panel installation
- Solar system upgrades
- Solar system repairs and maintenance
- Site surveys and load profiling
- Inverter and battery integration
- Solar system commissioning
Instead of guessing how many panels or batteries you need, we recommend starting with your actual electricity consumption and the loads you want the solar system to support.
Tell us what you want to power, and we can help you design the right system.
Get a Solar Quote
Aretha Solar Power Solutions Limited
Based in Eldoret, Kenya, serving customers across Kenya.
📞 Call or WhatsApp: +254 140 630 915
Whether you need a small residential backup system or a large commercial solar installation, contact us for a site assessment and professional system design.
Your solar system should be designed for your needs—not simply built around a sales quotation.
Frequently Asked Questions About Solar Installation in Kenya
How much does a solar installation cost in Kenya?
Without doubt, the cost depends on the system size, inverter, batteries, solar panels, mounting structure, protection equipment, installation complexity and the customer’s energy requirements.
A proper quotation should therefore be based on a load assessment rather than a generic price per kilowatt.
How many solar panels do I need for my house?
There is no single answer.
The required number of panels depends on your daily energy consumption, available roof space, panel wattage, solar resource, inverter capacity and desired battery charging requirements.
For example, a 620 W panel produces a different amount of energy from a 450 W panel, but the correct system design also has to consider voltage and current—not just wattage.
How much battery storage do I need?
Battery capacity depends on how much energy you need to store and how long you want the system to operate without sufficient solar generation or grid power.
A customer who needs only evening backup will require a different battery capacity from a customer seeking extended off-grid operation.
Can solar panels work during cloudy weather?
Yes. Solar panels can still generate electricity under cloudy conditions, although output is normally lower than under strong direct sunlight.
The amount of energy produced depends on cloud cover, panel orientation, shading, weather conditions and other factors.
Should I choose a hybrid or off-grid solar system?
That depends on your electricity requirements and whether grid power is available.
A hybrid system can combine solar, batteries and grid electricity, while an off-grid system is designed to operate without relying on the utility grid.
The correct choice should be made after assessing your loads and energy requirements.
Why is solar system commissioning important?
Commissioning confirms that the installed system is operating as designed.
It can include checking PV string voltages, battery communication, inverter operation, protective devices, earthing, system output and other electrical parameters.
Why should I use a professional solar installer?
To point out, a professional installer can help ensure that the system is correctly designed, installed, protected, tested and documented.
Not to mention, for larger systems, mistakes in cable sizing, battery configuration, PV string design, protection or inverter configuration can become expensive and potentially dangerous.
See the Installation Process
This project was documented throughout the installation process so customers could see what happens behind the scenes.
First Episode: Site preparation and initial installation
Second Episode: Battery diagnosis and system assessment
Third Episode: Roof mounting and solar panel installation
Fourth Episode: System testing and the 9 p.m. cutoff
Related Solar Articles
Previous post: Episode 1 — Solar System Repair Kenya – Kitale Case Study
Battery diagnosis: Episode 2 — Solar Battery Health Check Kenya
9 p.m. cutoff: Episode 4 — System testing
Solar commissioning: Learn about our solar installation and commissioning services
Recommended Resources
For equipment specifications, always refer to the manufacturer’s current documentation:
- Deye — inverter manufacturer and technical documentation
- JinkoSolar — solar panel manufacturer and module specifications PDF Download
- LVTopsun — battery manufacturer and product information
- EPRA — Kenya’s energy regulatory authority and solar PV regulatory information
Ready for a Professional Solar Installation?
A solar system is a long-term investment.
Do not compare quotations only by the number of panels, inverter size or final price.
Compare the engineering, equipment, protection, installation workmanship, commissioning and documentation included in each quotation.
If you are looking for a solar company in Kitale, Eldoret or Kenya, talk to Aretha Solar Power Solutions.
📞 Call or WhatsApp: +254 140 630 915
Aretha Solar Power Solutions Limited — Solar systems designed, installed and commissioned with attention to detail.